
For most events, the kitchen cooks for a number someone mentioned weeks ago. Nobody knows exactly who will turn up or what they'd like to eat. So extra gets made, just in case. This guide takes you through Waste Warrior from draft to final confirmation and kitchen totals. For each step, you'll read why it prevents waste.
Why a guest list with menu choice prevents waste
A lot of food is left over at events, even when the number of guests is known in advance. In Ireland, hotel functions waste an average of 530 grams of food per guest, from preparation to plate (EPA Ireland, 2022). At Dutch lunch meetings, 22% of what is served is left over (Samen Tegen Voedselverspilling, Veneca and WUR, 2024).
A number on an invitation is not the same as a guest at the table. Data from an event software vendor suggests that about one in five registered attendees doesn't show up, and even more at free events (PheedLoop, 2026).
Guidelines for sustainable events therefore give the same advice. Ask guests to register in advance and share their dietary needs, so the caterer can plan with an accurate count (WMA Green Guidelines, 2022). Keep sharing who's coming and who drops out with the kitchen until just before the event, and don't overproduce special meals (U.S. Food Waste Pact, 2026). When you guess, you cook extra to be safe. When you ask, you don't have to guess.
Step 1: prepare the menu and create the event
Start with the menu, because you link it to the event when you create it. After that, an event's menu can't be swapped.
- In the sidebar, go to "Kitchen" and open "Menus". Create a menu with "Create new menu", or use your current menu.
- Add courses with "Create new course" and dishes with "Add new dish". A dish has a name and a description. A price is optional.
- Under "Allergies", select the allergens the dish contains. You choose from the 14 EU allergens.
- Want to offer extras, such as a different sauce? Add them with "Add supplement".
Why this matters: guests see the allergens for every dish. Someone with a nut allergy picks a dish that suits them. The kitchen then needs fewer just-in-case portions for needs nobody actually mentioned.
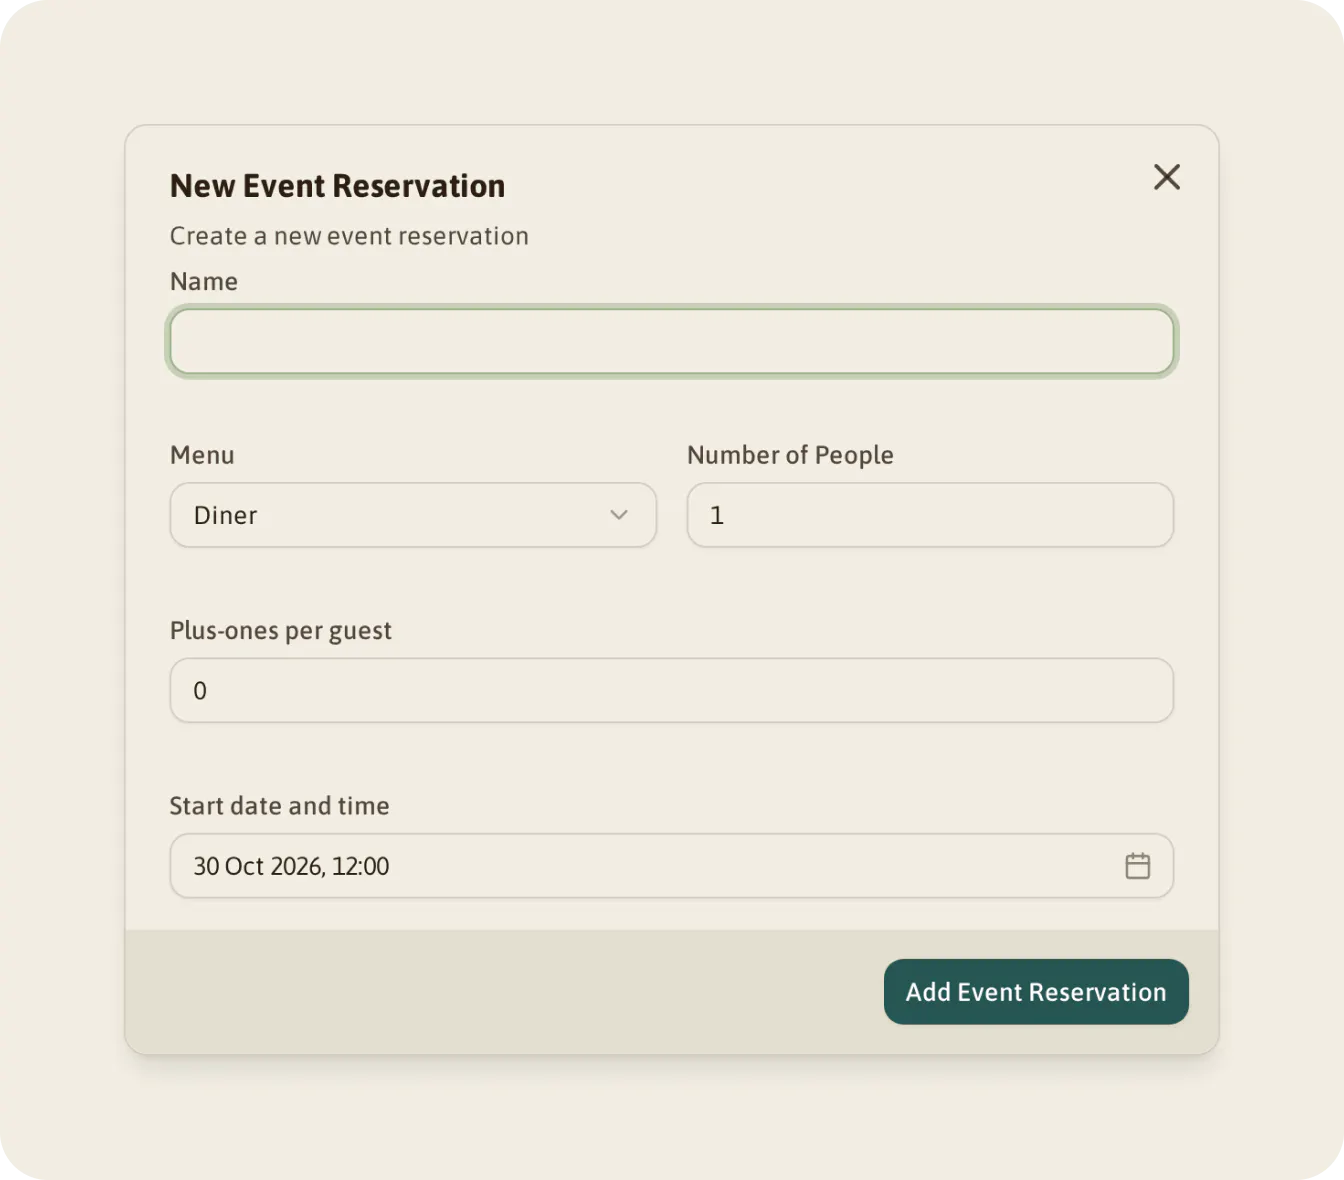
Then create the event. In the sidebar, go to "Reservations" and "Events", and choose "New Event Reservation". Fill in:
- Name. This is also what your guests will see.
- Menu. Your active menu by default.
- "Number of People". The number of places you expect.
- "Plus-ones per guest". How many people each guest may bring. Zero means nobody.
- "Start date and time".
The event starts as a "Draft". While it's a draft, no message goes out. You add a description later on the event page; guests see it at the top of their personal page.
Do you see the notice "Guests can't respond to invitations yet"? Then the menu choice module is still off for your venue. Get in touch, and we'll switch it on for you.
Step 2: set up your guests
The "Overview" tab of a draft shows a short checklist: "Set up guests" and "Plan communication". In the first step, Waste Warrior asks whether you have a guest list decided in advance. Choose "Yes, I have a list" to import or add guests. Choose "No, share a link" to let people register themselves. You can also do both.
Importing a guest list
Already have the names, for example from a staff list? Import them in one go.
- Create a file with three columns: "Name", "Email" and "Phone". The order doesn't matter, but all three headers must be there.
- If you work in Excel, save the file as CSV. An .xlsx file isn't accepted.
- Enter phone numbers in international format, so with +31 or your country code in front. That way WhatsApp can use them.
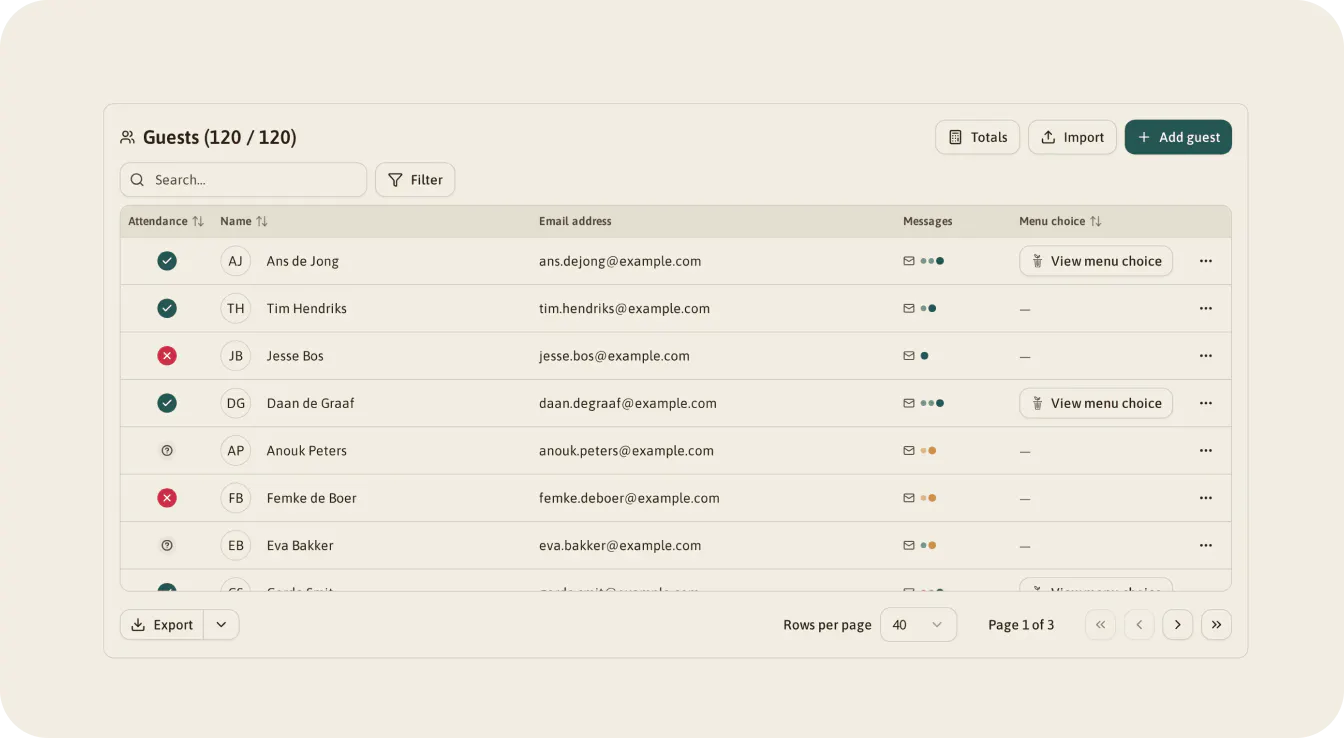
- Open the "Guests" tab, choose "Import" and upload the file. You can also drag it onto the table.
Each row needs an email address or a phone number. If the file contains an error, the whole file is rejected, with the row numbers listed. Duplicate addresses aren't filtered out on import, so remove them yourself beforehand.
You add individual guests with "Add guest": a name, an email address and a phone number. An email address or a phone number is required.
Sharing a public registration link
Don't know in advance who's coming, as with an open staff party? Then switch on the "Public registration link". Anyone with the link can sign up. People who sign up appear straight away on the "Guests" tab and receive their own personal link by email.
- Copy the link with "Copy" and share it yourself, for example on your intranet or in a newsletter. Waste Warrior doesn't send the link for you.
- Close registration with "Disable link". Anyone who clicks after that sees that registration is closed. People who already signed up keep their place and their personal link.
After publishing, check that the banner still shows the link as active.
If you go over the number of guests you set, you'll see a warning. Sign-ups aren't blocked, though, so keep an eye on the count yourself.
Plus-ones
"Plus-ones per guest" sets how many people a guest may bring. On their personal page, the guest adds someone with "Add someone" and a first name. They then also say whether that person is coming and what they'd like to eat. You see the party under the "Main booker", in the "Group" section of the guest details. There you can also add someone yourself with "Add companion", or enter choices for a guest who phones in.
Why this matters: a plus-one you know nothing about is a plate you have to guess. With a name and a choice, they simply count in the totals.
Step 3: plan the communication moments
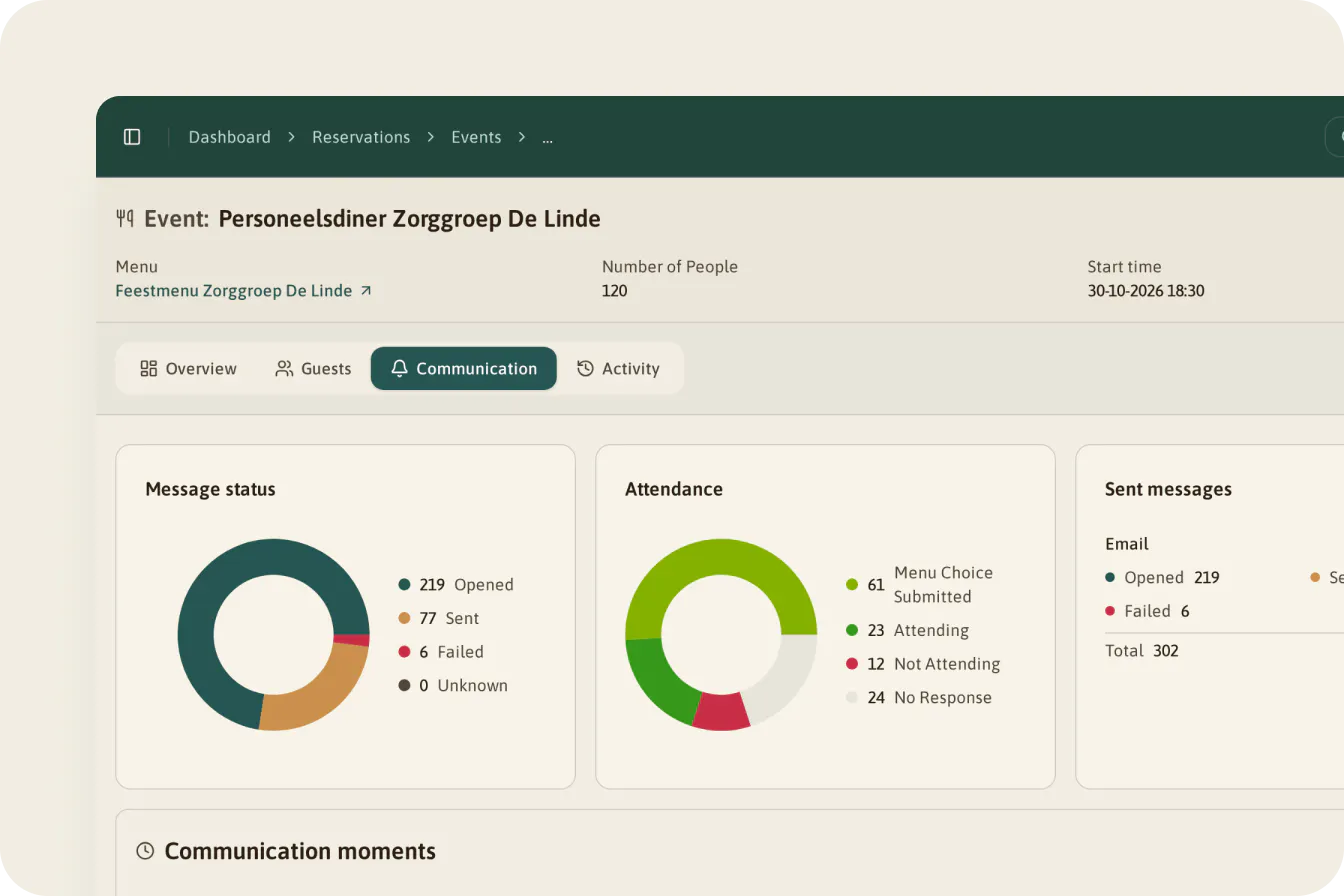
On the "Communication" tab you decide which messages your guests receive, when, and through which channel. Waste Warrior works in phases:
- "Attendance". You ask whether the guest is coming.
- "Menu choice". You ask the guest to choose a dish.
- "Final confirmation". One last message just before the event.
A phase consists of an "Invitation" with a deadline, plus as many reminders as you like between the invitation and the deadline.
Start with a ready-made schedule
If the event has no moments yet, you can choose from three schedules:
- "Sequential" (recommended). Attendance first, then menu choice. The attendance invitation goes out 28 days ahead, with a reminder a week later and a deadline 14 days ahead. Then the menu choice invitation follows, with a reminder 7 days ahead. The final confirmation goes out 3 days ahead.
- "Compressed". Both phases at once, starting two weeks ahead, with the final confirmation 3 days ahead.
- "Attendance only". A single two-week attendance phase, with no menu choice.
If your event is too close for a schedule, it's greyed out. So create events early, or choose "Or set up your moments manually".
The schedule is a starting point, not a straitjacket. In "Sequential" the menu choice deadline is the start of the event. For purchasing, that's often too late, so set it to when your caterer needs the numbers.
Adding or editing a moment
Choose "Add moment". There are two steps:
- Details. Under "What do you want to ask?" you choose attendance, menu choice or final confirmation. You set the "Date and time" of sending and, for an invitation, the "Deadline". You can add a short note of up to 200 characters for your guests.
- Channels. Switch on "Email", "WhatsApp" or both. For email, choose an "Email template", or make your own variation.
Only the people who haven't responded
Under "Send to" you choose who gets a message: "Attending", "Not attending" or "Not responded". By default, attendance messages go to everyone. Menu choice and final confirmation messages go to those who are coming and to those who haven't responded yet.
A reminder sent only to "Not responded" is the most useful one you can send. Guests who already said yes or no don't get a needless message. And every open answer that still comes in is one guest fewer for the kitchen to guess about.
Email and WhatsApp
Messages go out by email and by WhatsApp. Our messaging isn't tied to one channel. If you want to reach your guests another way, Signal for example, we can add it on request.
An email needs an email address and a WhatsApp message needs a phone number. And for events there is no automatic fallback: if a WhatsApp message fails, no email follows by itself. So switch on both channels for each moment when you have both details for your guests.
If you send by WhatsApp, ask guests beforehand to opt in to messages from your organisation (WhatsApp Business Messaging Policy).
Step 4: publish, and see what your guests see
Once the guests and at least one communication moment are in place, the checklist tells you the event is ready to publish. Choose "Publish". From then on, messages go out at the planned times.
- Publish in time. A moment that has already passed while the event was a draft is labelled "Missed" and isn't sent afterwards. Move such a moment forward or delete it.
- Publishing is final. You can't turn an event back into a draft. You can keep editing guests and moments, though.
Your guest's personal page
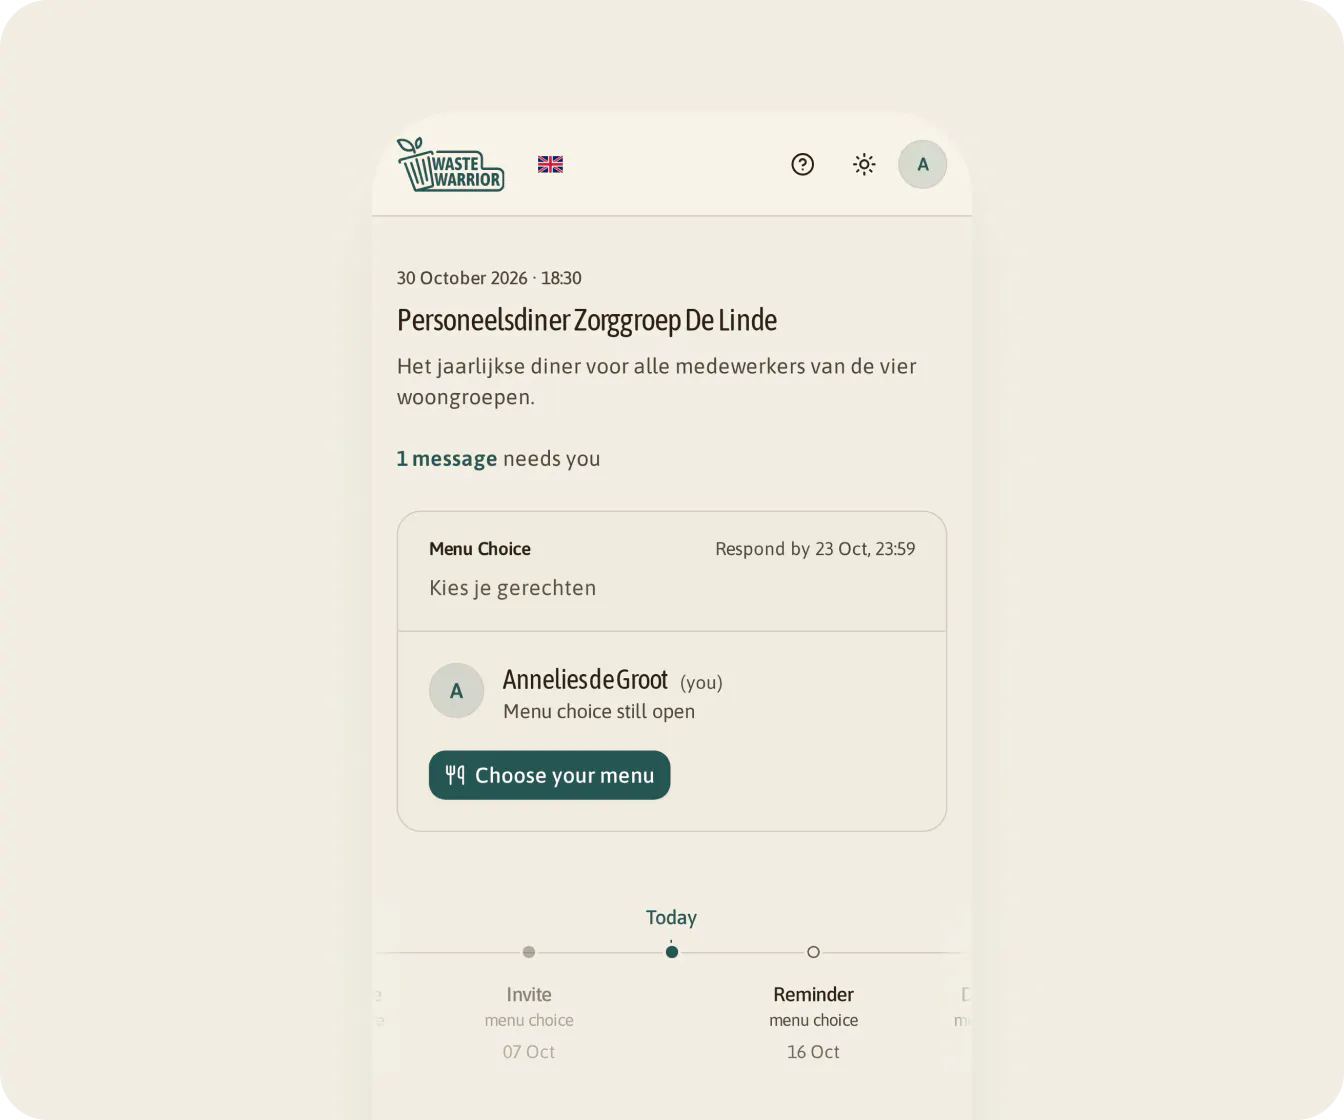
A guest doesn't need an app or an account. The link in their email or WhatsApp opens their personal page, in Dutch or English, with the date, the time and your description.
- Each person has a status, such as "Confirm attendance" or "Coming, menu chosen".
- With "Choose your menu", they pick their dishes, with the allergens shown. They pass on an allergy or diet in the dietary needs field, and add notes for the kitchen under "Comments". They finish with "Confirm your choice".
- Until the deadline they can change their choice. With "I can't come after all" they decline, together with their whole party.
- The "Event timeline" shows when the next question opens.
An allergy or diet counts as health data: only ask for it if the kitchen needs it. More in Guest data and the GDPR for reservations and events.
Lost their link? On the sign-up page, a guest can use "Request a new personal link" to have a new one sent to their email address.
Step 5: follow the responses and the messages
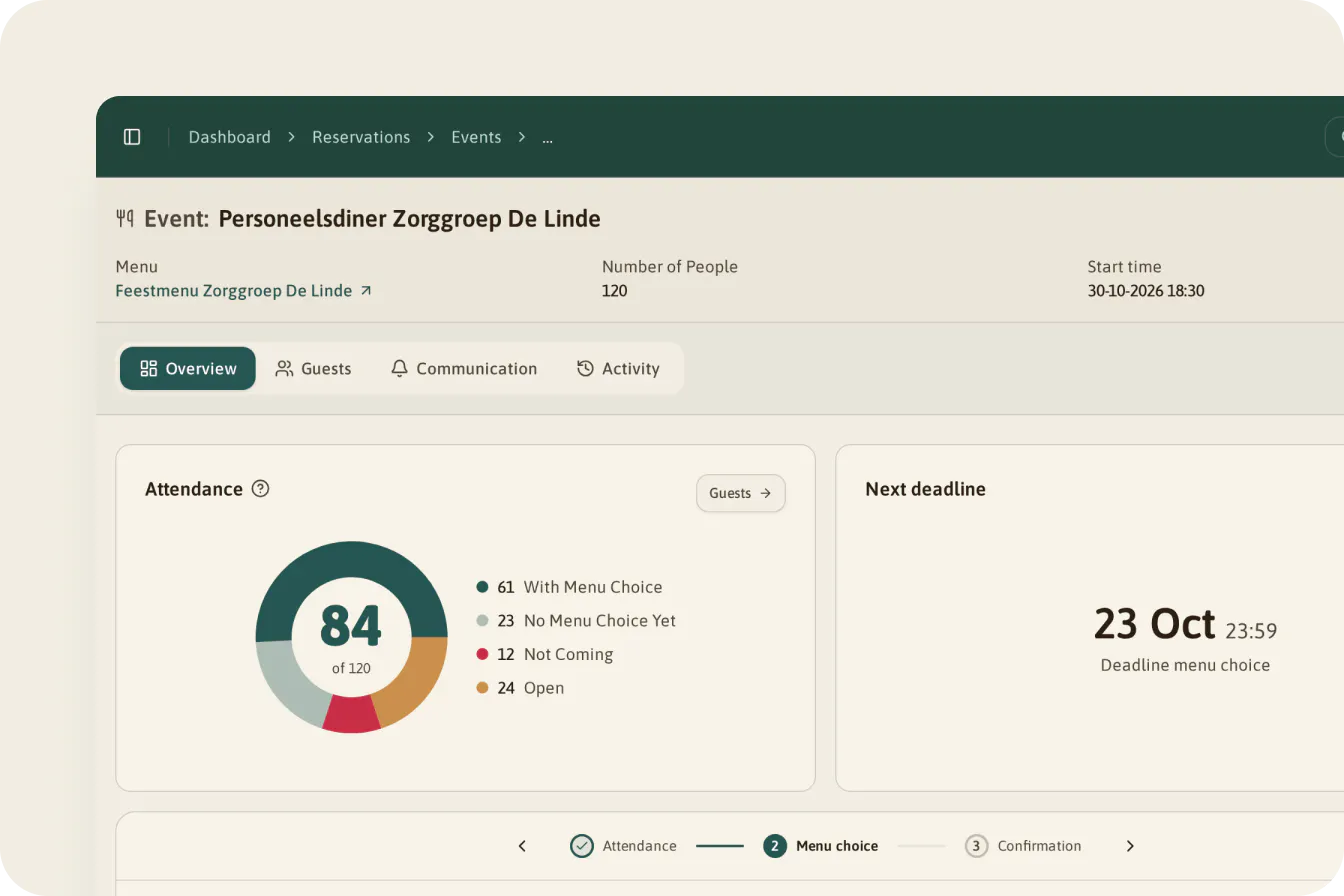
The "Overview" tab of a published event shows at a glance where things stand. The "Attendance" tile puts your guests in four groups:
- "with menu choice": coming, and has chosen.
- "no menu choice yet": coming, but hasn't chosen yet.
- "not coming": has declined.
- "open": hasn't responded yet.
Under "Preparation phases" there's a card for each phase: attendance, menu choice and confirmation. Each card shows who's coming, who isn't and who's still open, and what changed since the previous phase: new, edited, removed, declined or signed up. The menu choice card also shows the "Choices per dish".
On the "Guests" tab you can filter by attendance, "Has menu choice" and "Message status". The "Messages" column shows each guest's latest status per channel, such as "Delivered", "Opened", "Read" or "Bounced". If it says "Bounced" or "Failed", the address or number is probably wrong. Call that guest, or update their details. The "Activity" tab gives a timeline of everything that happened.
Why this matters: a gap in your list a week before the event can be fixed. On the day itself, the food is already prepared.
Step 6: final confirmation, totals and export
The final confirmation
The final confirmation is the last message before the event. It gives your guests an overview and one last chance to check that everything is still right. If someone drops out at that point, you'll see it on the confirmation card and in the totals.
Why this matters: schedule the final confirmation for the moment you place your last order with your supplier. Every cancellation that comes in then is food you don't buy and don't cook.
Totals for your kitchen or caterer
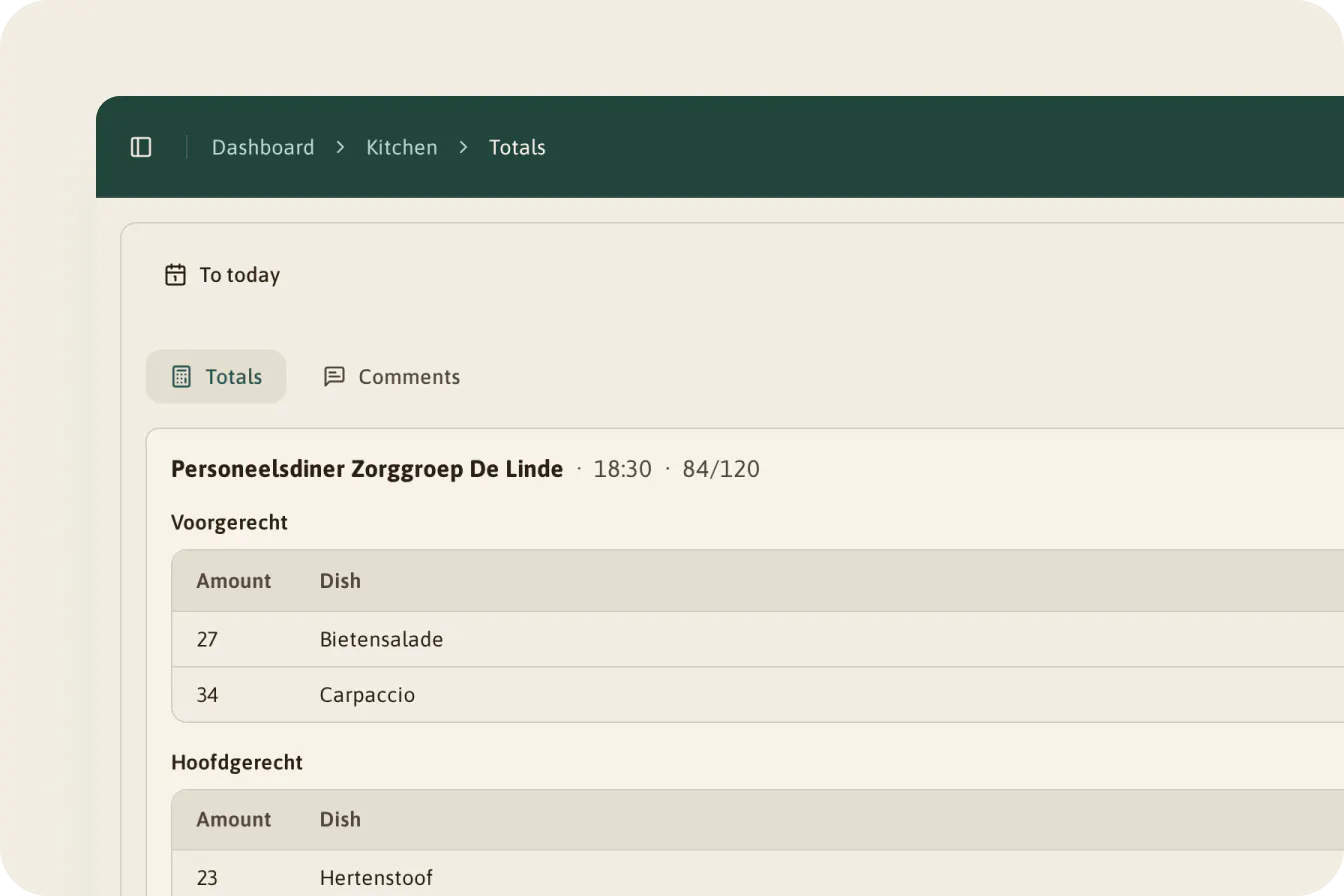
Choose "Totals" on the "Guests" tab, or go to "Kitchen", "Totals" and then "Events" in the sidebar. Pick the day. For each event you see how many guests are coming and, per course, how many of each dish are needed, including supplements. A separate "Comments" tab shows the notes guests added to their choice.
This is the overview for your caterer: not "120 covers", but this much stew, this much risotto, and the guest with the nut allergy. You can print or export the totals, or open them on a tablet in the kitchen.
Exporting the guest list
On the "Guests" tab, choose "Export" for a CSV file, or "Export options" for CSV, Excel, PDF, JSON or XML. The export contains each guest's name, email address and attendance. You print or export the menu choices from the totals; you'll also find them under each guest's menu choice.
Cancelling an event
Is the event off? Choose "Cancel event" in the events list, or the bin icon on the event page. The event gets the status "Cancelled" and stays in your overview.
- All scheduled messages are removed.
- The box "Send cancellation email to guests" is ticked by default. Guests with an email address are then notified.
- Anyone who opens their personal link sees "This event has been cancelled."
The cancellation message goes by email only. If you have guests with only a phone number, let them know yourself that the event won't go ahead.
Tell your caterer straight away too. The sooner the cancellation is in, the less has already been bought.
How Waste Warrior Events helps with your event
With Waste Warrior Events you know who's coming and what they'll eat. Your guests use one personal page to say whether they're coming, what they choose and what the kitchen should keep in mind. They don't need an app or an account. You plan the invitations and reminders for each phase, by email and WhatsApp, and watch the answers come in.
The kitchen gets the number of each dish per event, with the comments alongside. So you cook for what was chosen, instead of for an estimate plus a margin. More background is in Food waste at events and catering: where it goes wrong. To also measure what's left over afterwards, read Measuring food waste in restaurants: what it costs and where to start. Short answers are in the frequently asked questions about events.
Curious how this would work at your next event? Plan a demo, then start small, with a pilot at your next event.